BigQuery is a game-changer for analyzing SEO data, offering insights that go beyond what Search Console or other SEO tools can provide.
I will show you how to connect Google Search Console to BigQuery.
Why Export GSC Data to BigQuery?
Exporting data from GSC to BigQuery offers several benefits:
- Long-Term Data Storage: BigQuery stores data over extended periods, allowing you to analyze trends beyond GSC’s default data retention limits.
- Advanced Data Analysis: BigQuery’s SQL capabilities allow for custom queries and advanced analyses, providing insights that are difficult to obtain in GSC alone.
- Automated Reporting: Data stored in BigQuery can be connected to Looker Studio for real-time dashboards, enabling ongoing SEO monitoring and automated reporting.
How to Connect Google Search Console to BigQuery (Full Beginner Tutorial)
Video guide:
This guide walks you step-by-step through the entire process, from setting up a Google Cloud account to successfully connecting Search Console and BigQuery for automatic data export.
What You'll Need
- A Google Search Console account with Full access to a verified property.
- A Google Account (Gmail).
- 15–20 minutes.
- A credit card (required to activate the free Google Cloud plan — you won’t be charged unless you go over the free tier).
Step 1: Create a Google Cloud Account
- Go to https://console.cloud.google.com/
- Sign in with your Google account.
- You’ll be prompted to set up billing:
- Add your name, country, and card info.
- You’ll get a $300 free credit valid for 90 days.
- You won't be charged unless you explicitly upgrade after using the free tier.
Without adding Payment profile you cannot do anything in Google Cloud!
Step 2: Create a Google Cloud Project
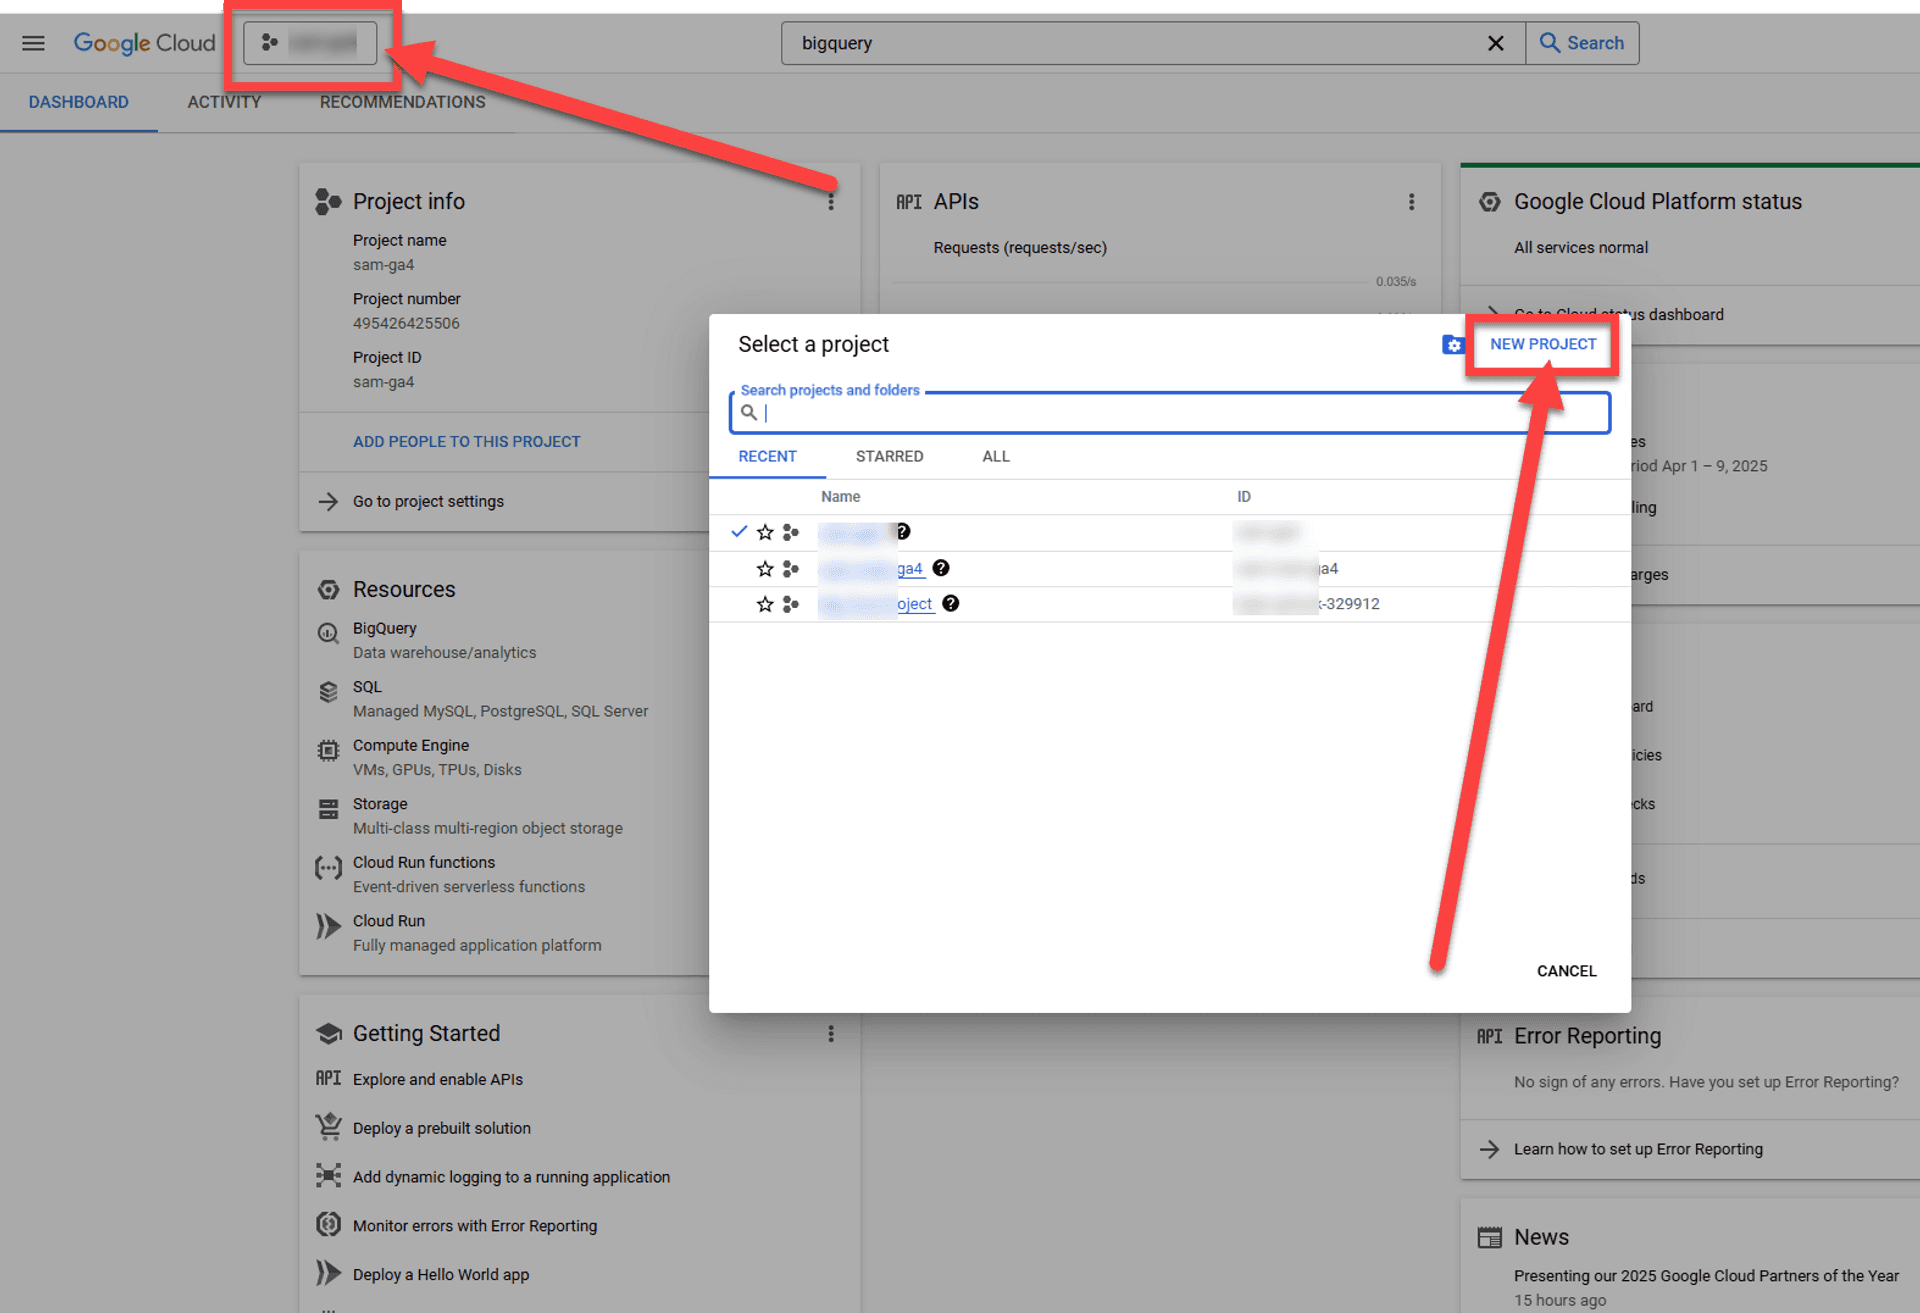
- In the Cloud Console dashboard, click the project dropdown in the top bar.
- Click "New Project".
- Give it a name (e.g.,
search-console-export). - Click Create.
- Wait a few seconds and select the project if it’s not already selected.
Step 3: Enable Required BigQuery APIs
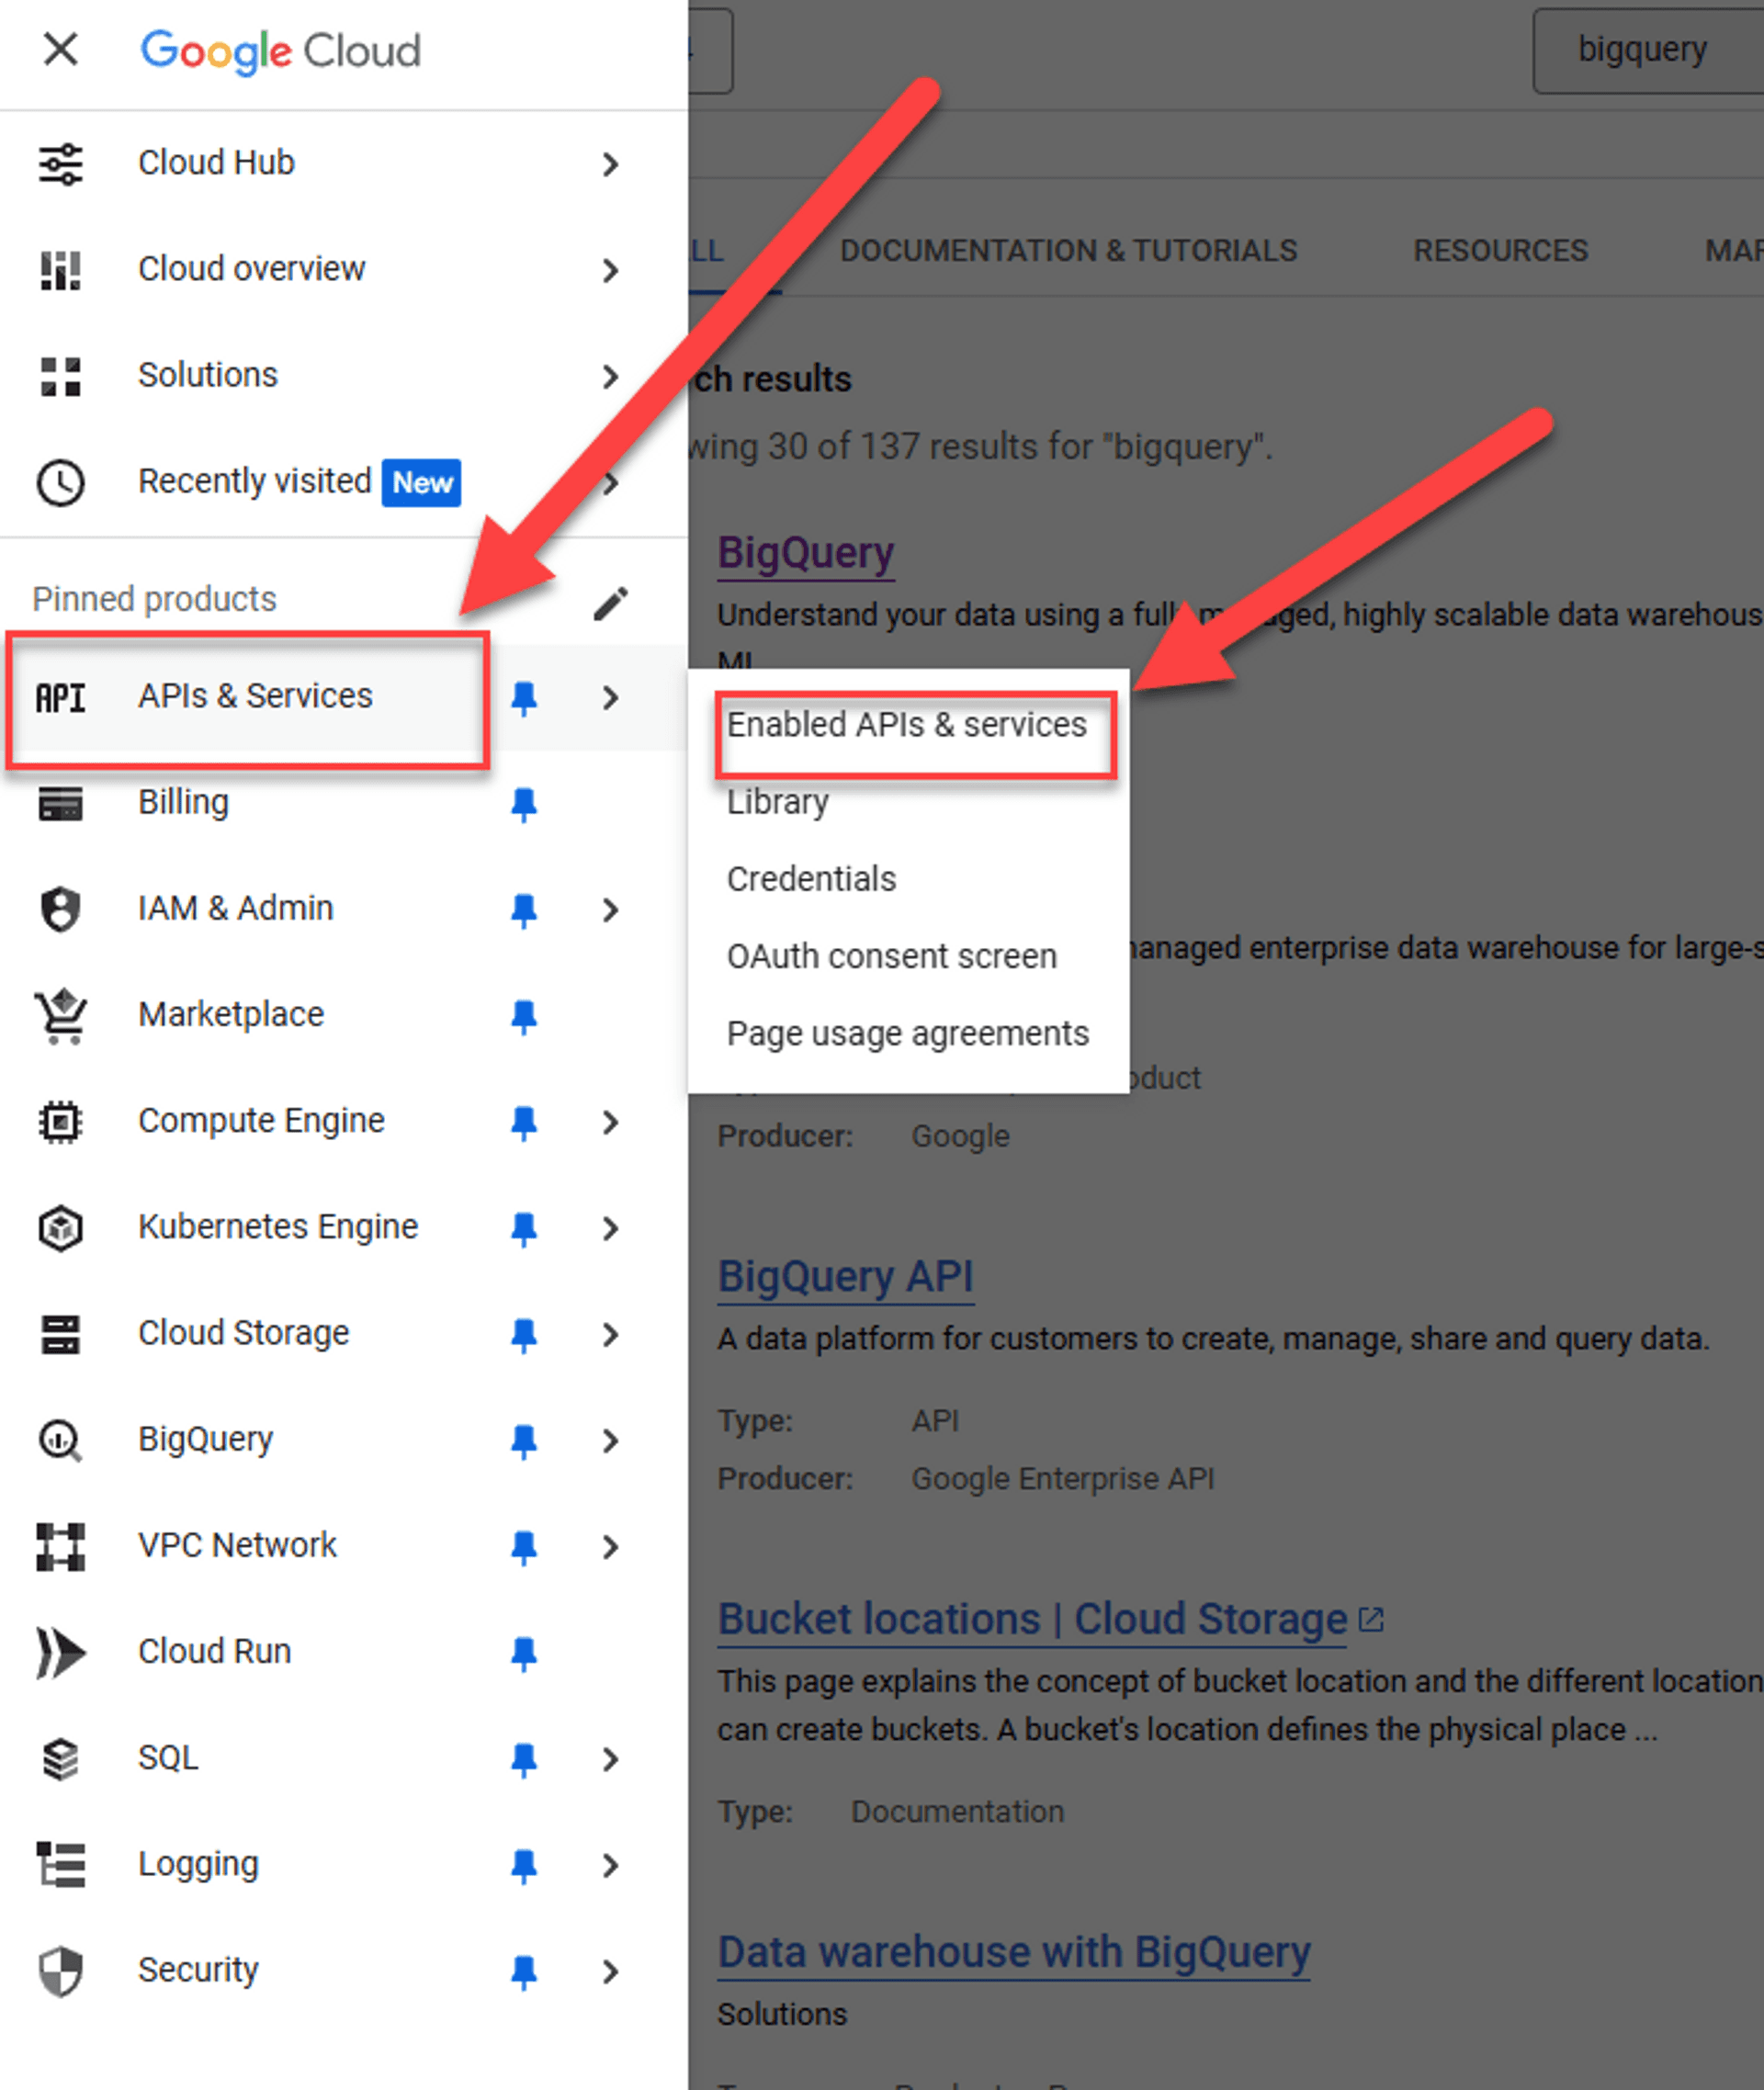
- In the left-hand menu, go to APIs & Services > Library.
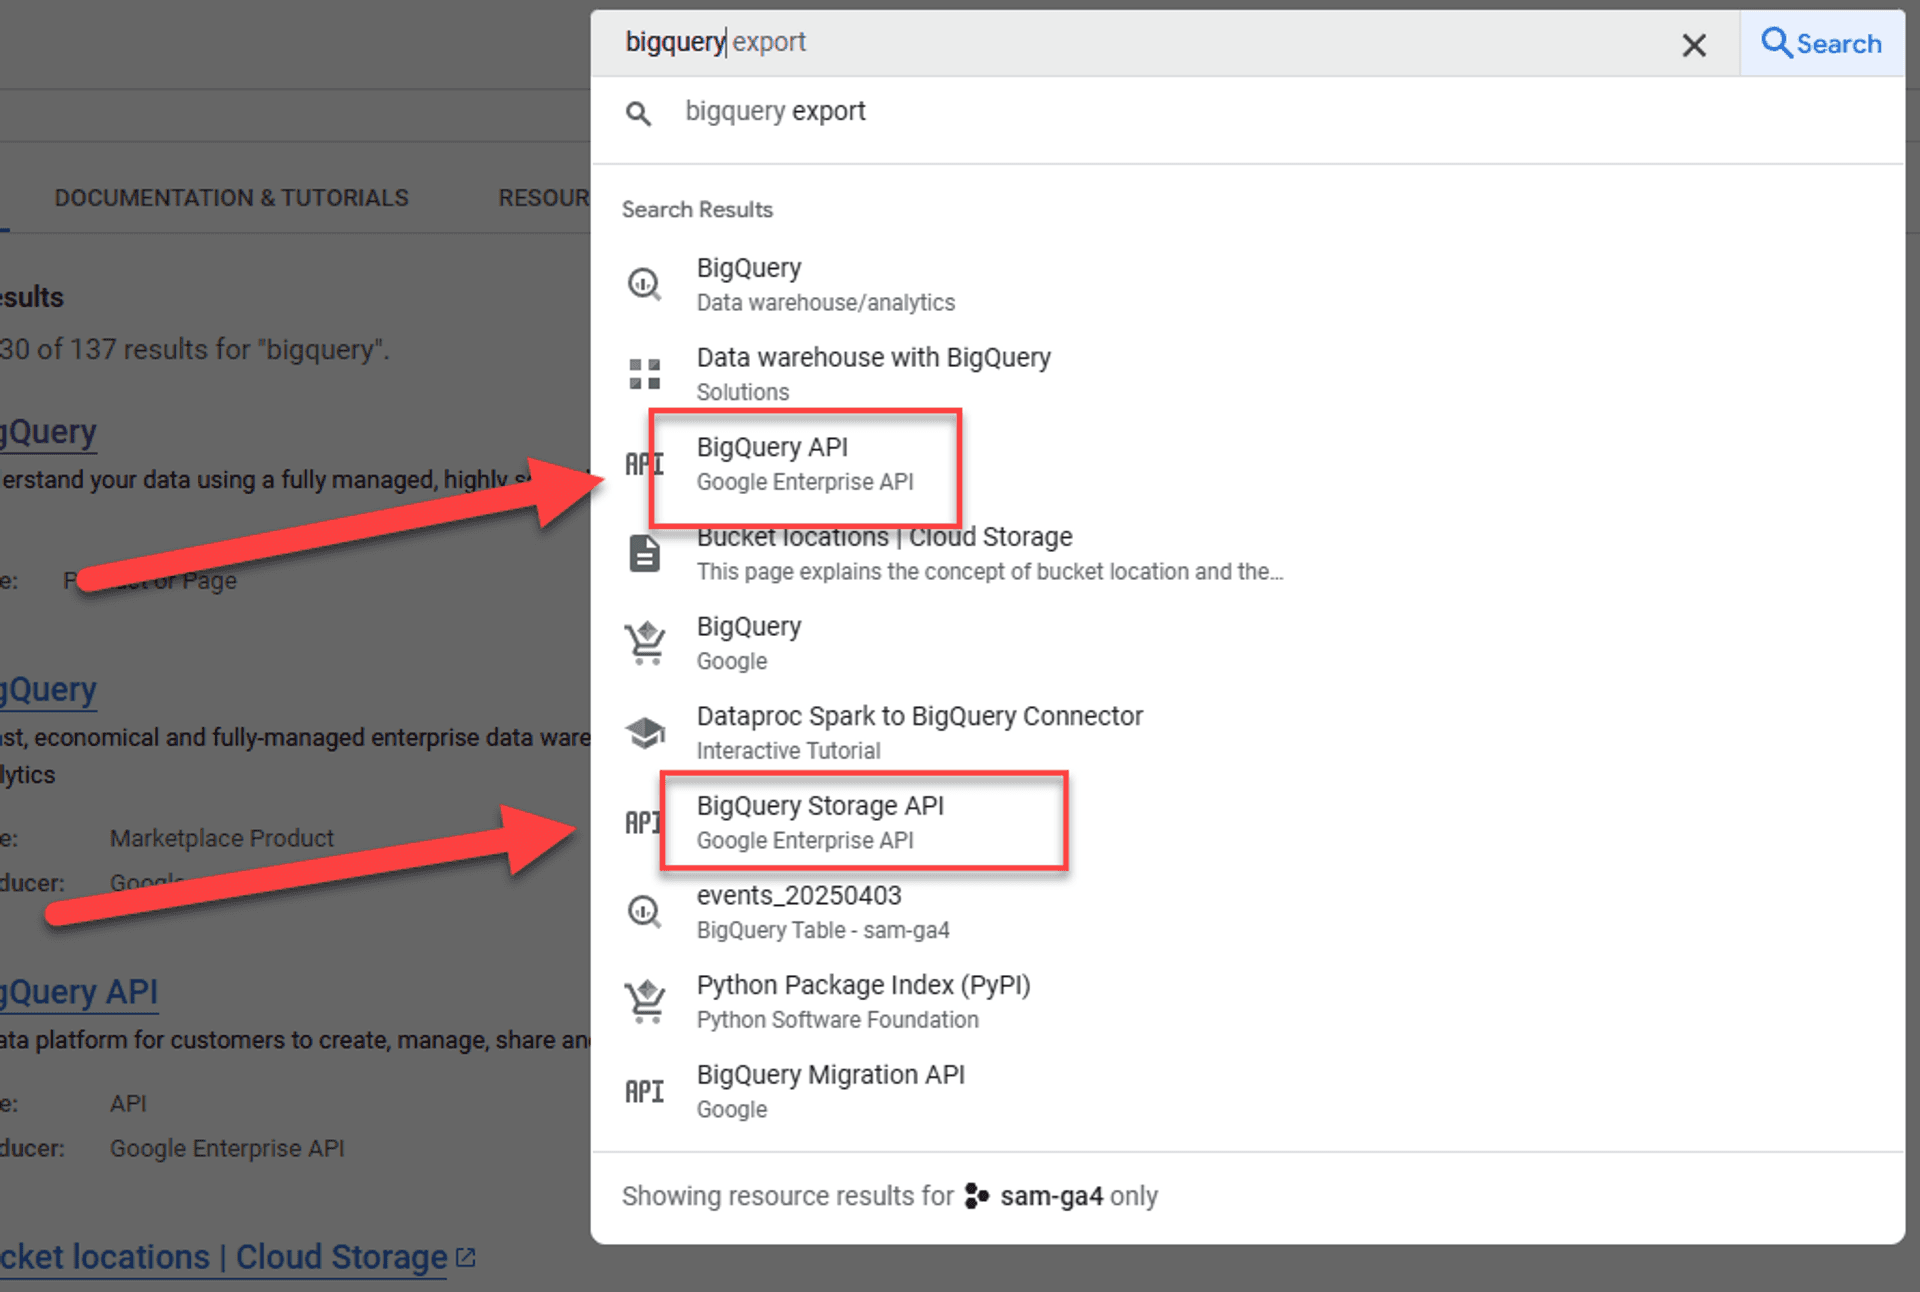
- Search for and enable these two APIs:
- BigQuery API
- BigQuery Storage API
How to enable:
- Click on each API, then click Enable.
Step 4: Grant Search Console Permission to Export Data
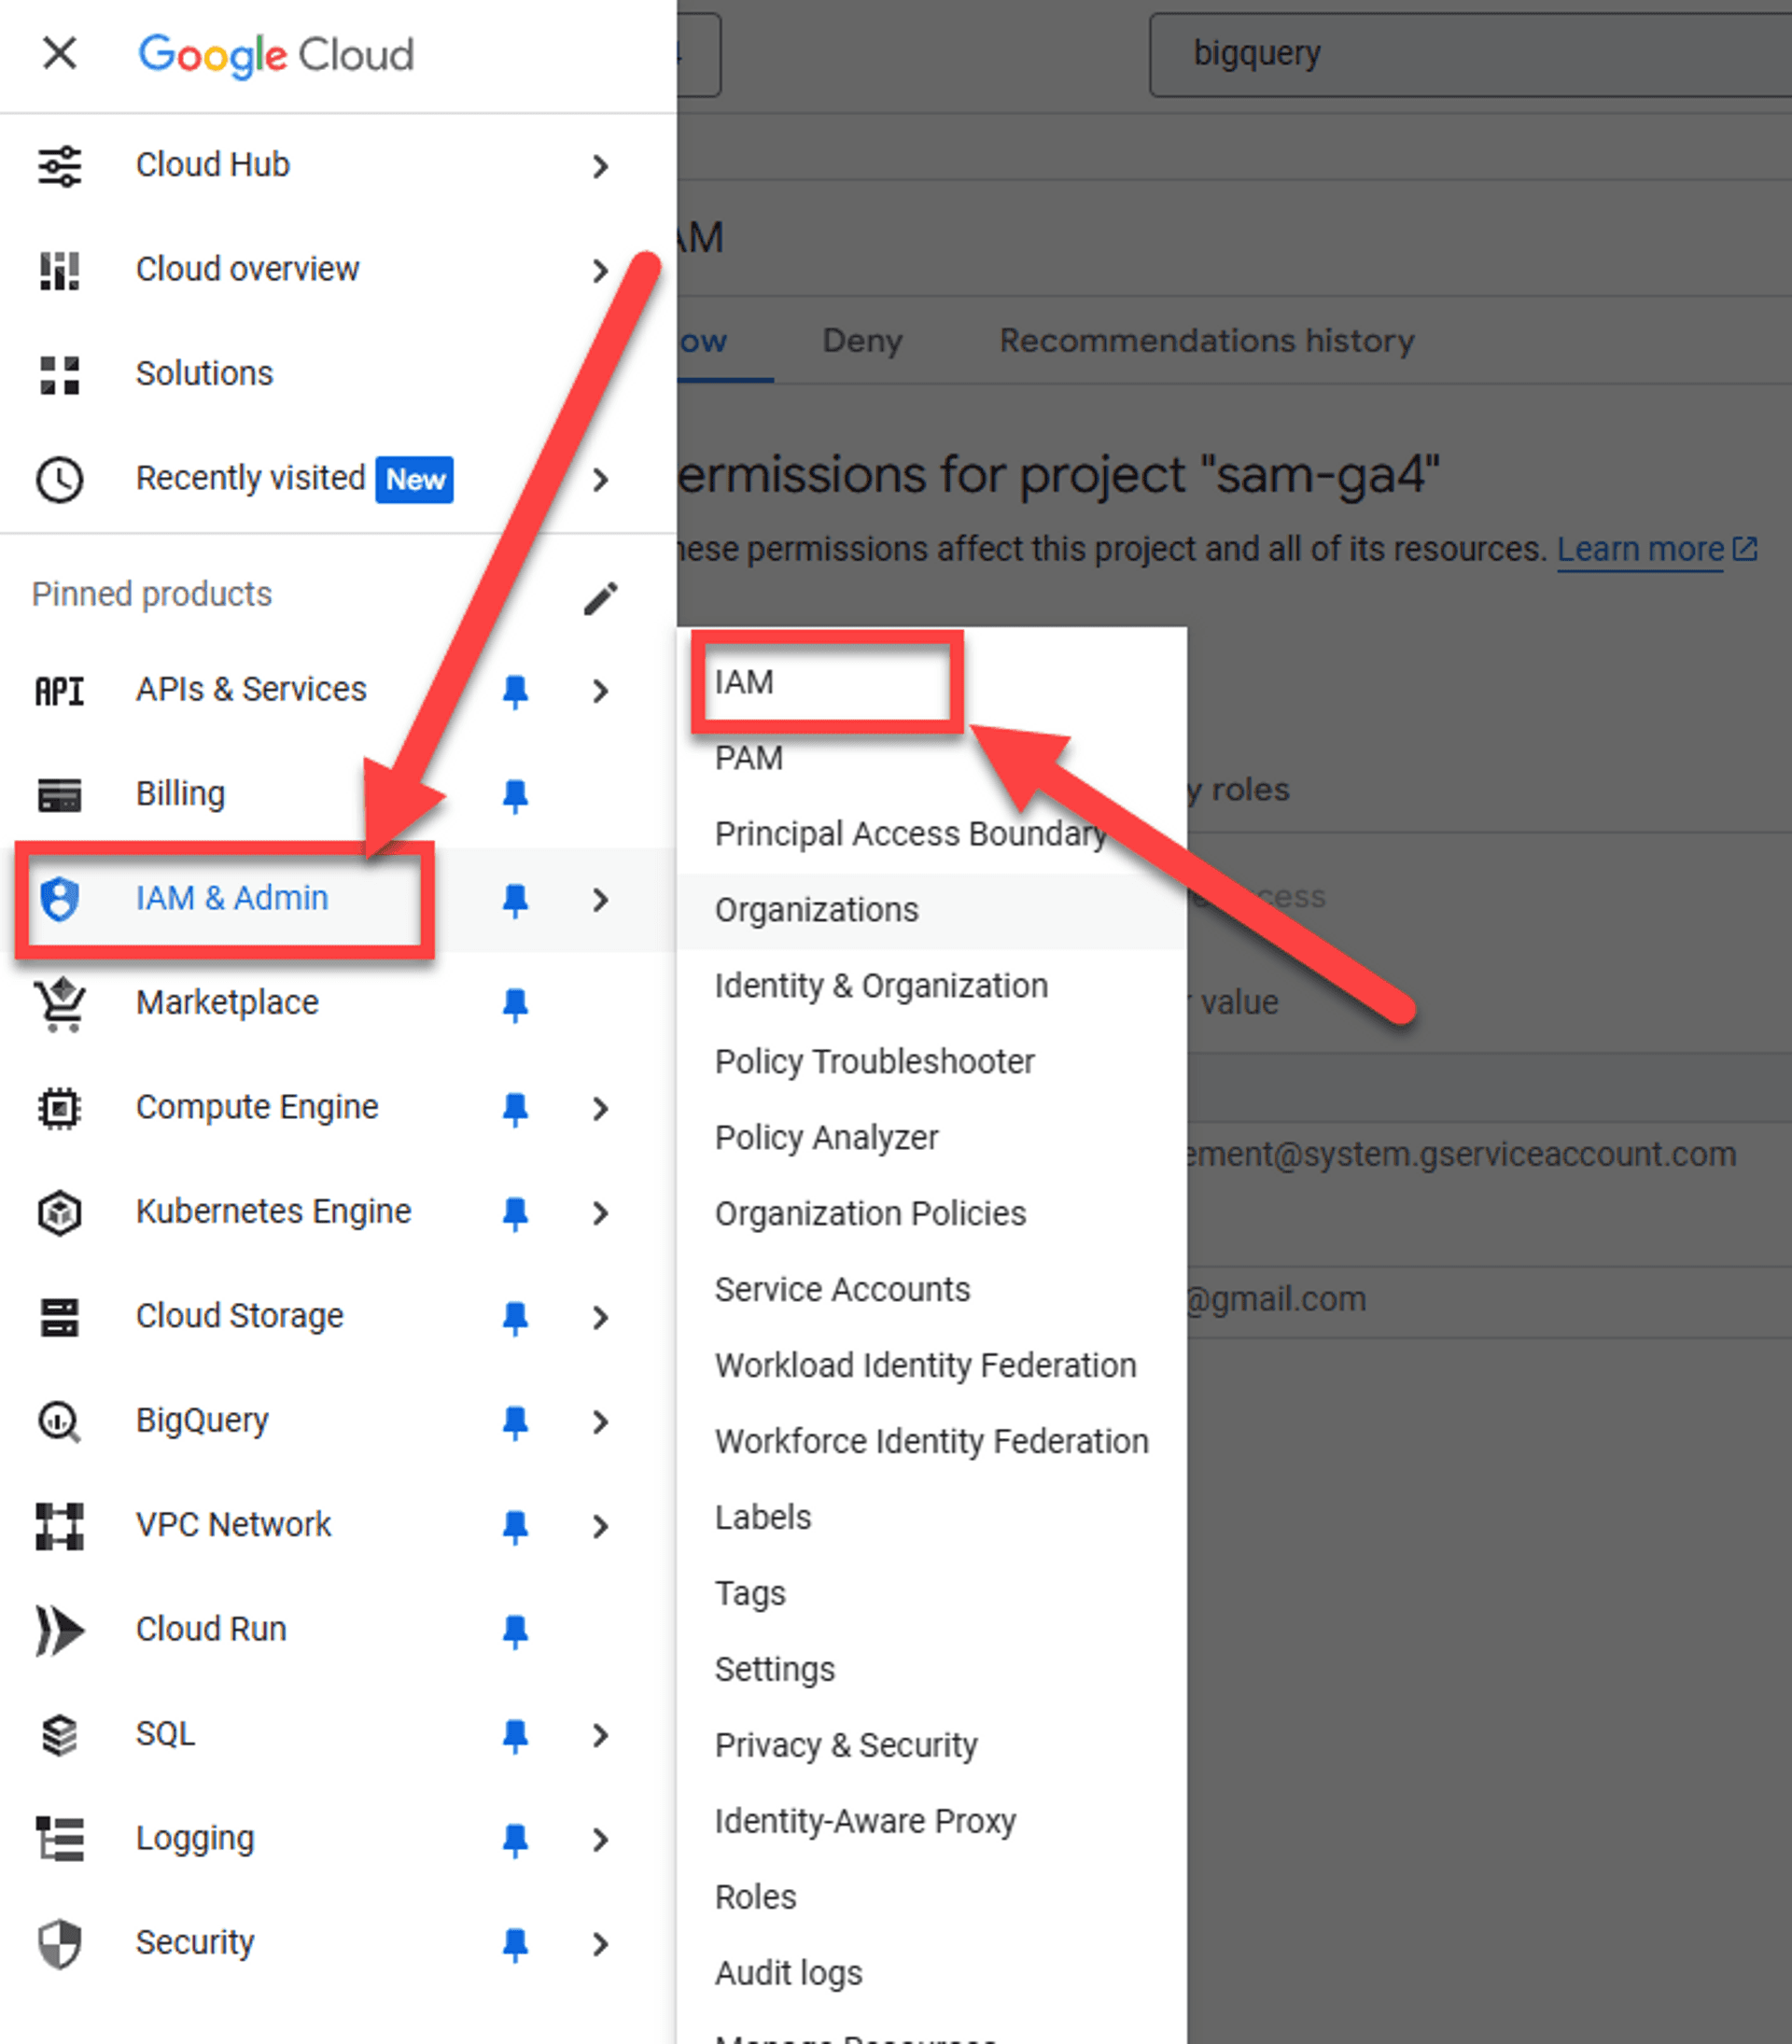
In the left-hand menu, go to IAM & Admin > IAM.
Click + GRANT ACCESS at the top.
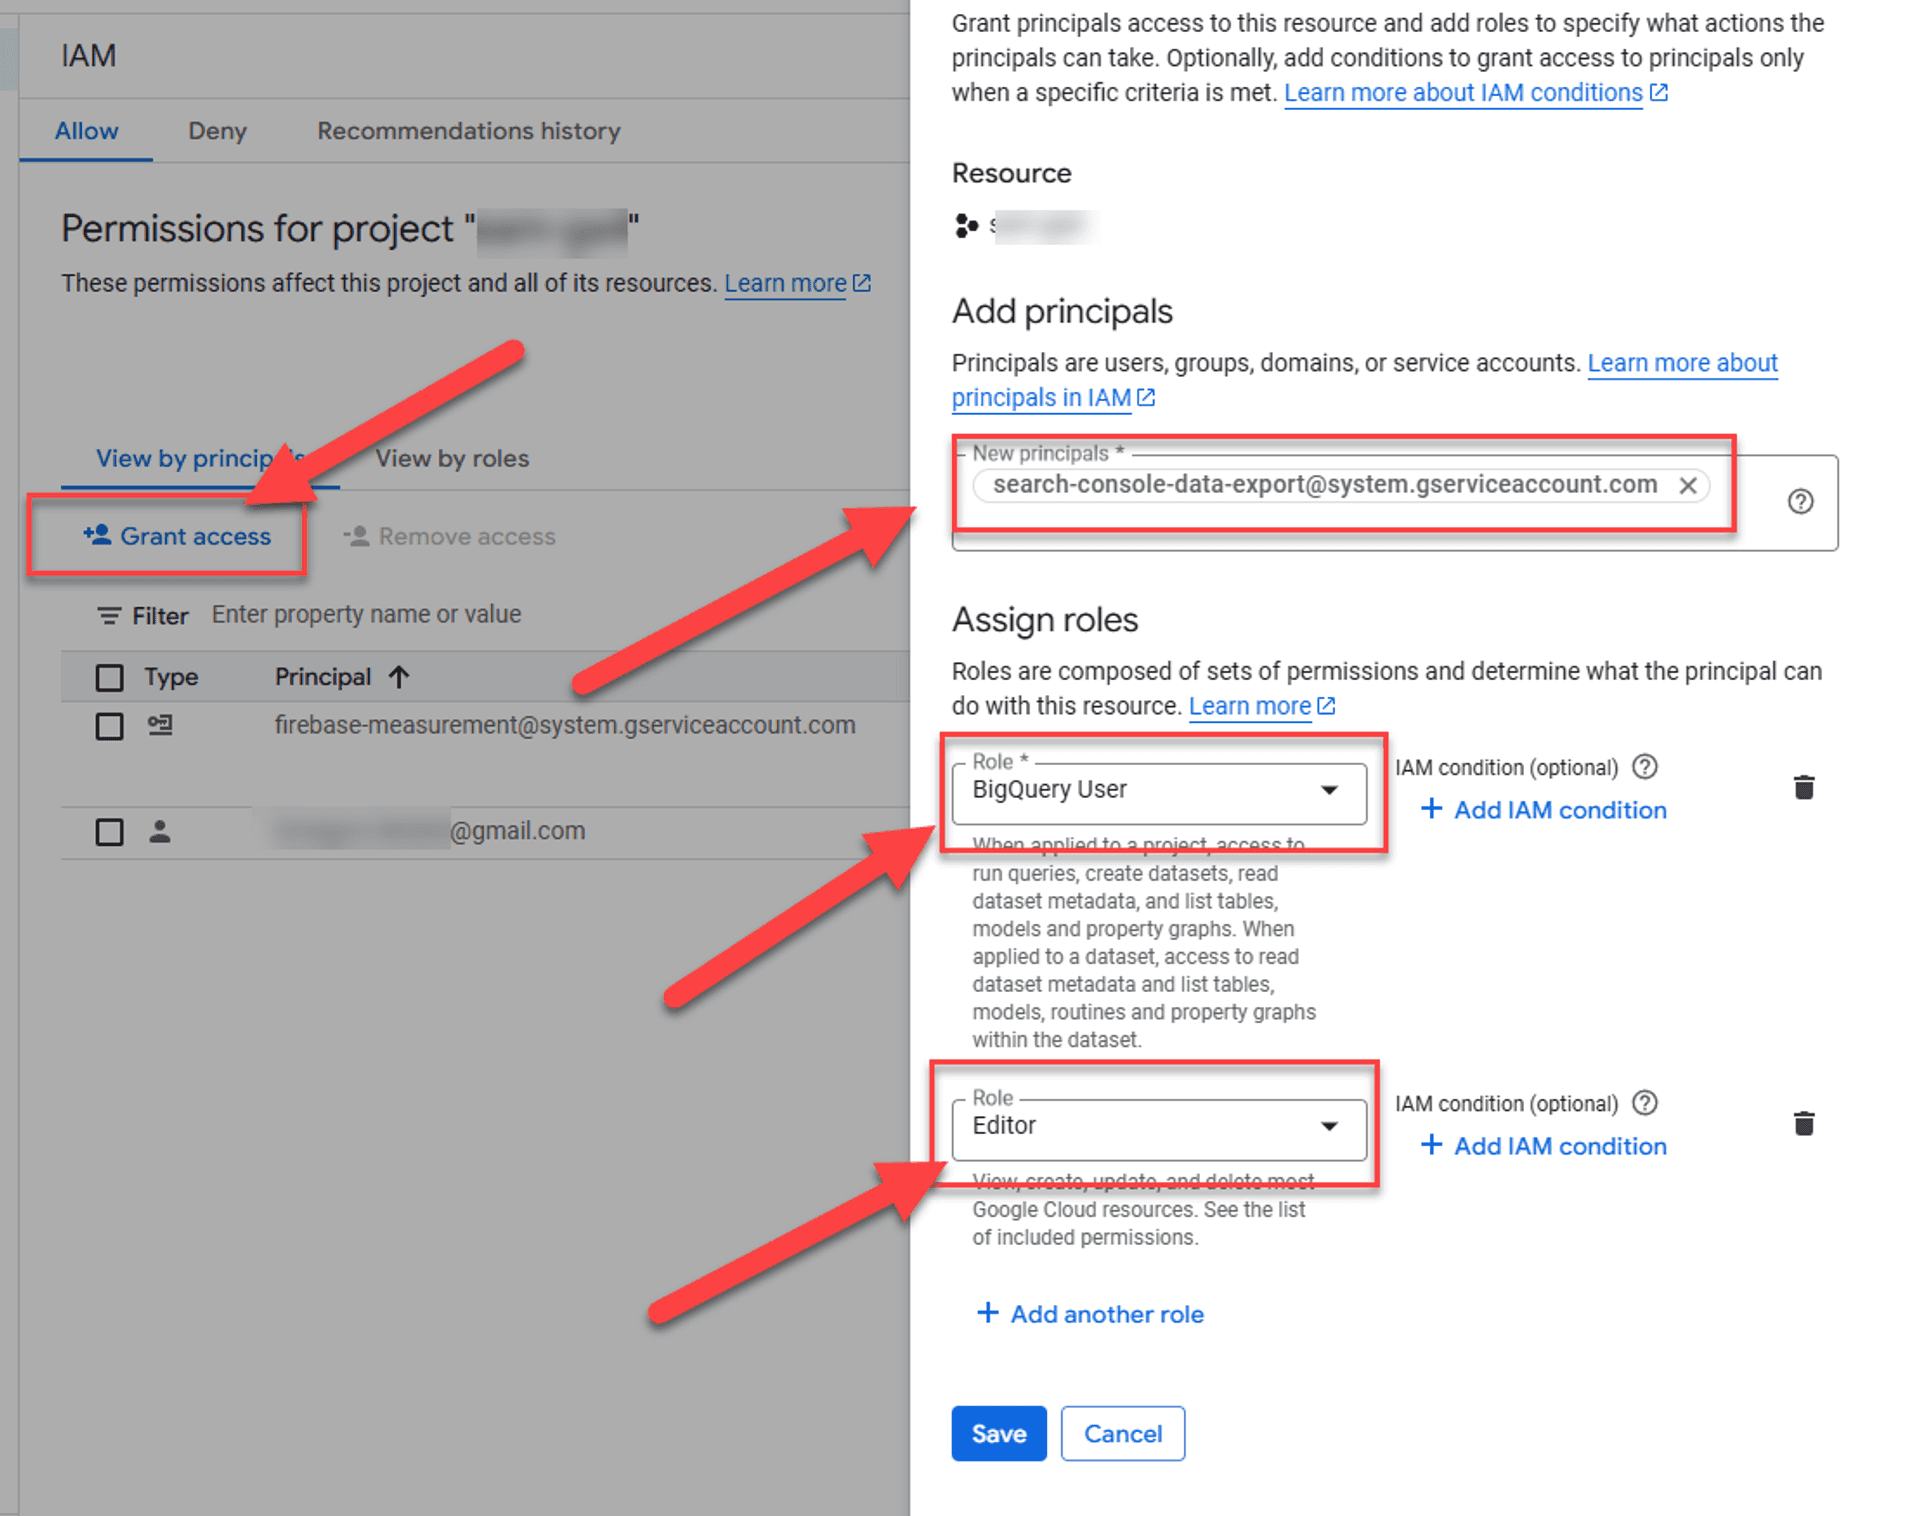
In New Principals, paste this exact email address:
search-console-data-export@system.gserviceaccount.comUnder Select a Role, assign these two roles:
- BigQuery Job User
- BigQuery Data Editor
Click Save.
💡 This is a critical step. Without these roles, Search Console cannot write to your BigQuery dataset.
Step 5: Set Up the Export in Google Search Console
- Go to Google Search Console
- Choose the property (website) you want to connect.
- On the left menu, go to Settings.
- Click Bulk Data Export.
- Fill in the required fields:
- Cloud Project ID: This is the project ID from Google Cloud (not the project name). You can find it in the Cloud Console under the project dropdown.
- Dataset Name: You can keep the default (
searchconsole) or use something custom (likesearchconsole_mywebsite). - Location: Select a region (e.g.,
USorEU). This cannot be changed later.
- Click Continue.
Search Console will now validate your setup. If everything is configured correctly, the export will begin automatically.
What Happens Next?
- First export will happen within 48 hours and include data from that day.
- After that, new data is exported daily.
- You can find your data in BigQuery > Explorer under the dataset you specified.
Optional But Recommended: Set Data Expiration
To avoid storage overuse:
- Go to BigQuery > Explorer.
- Click on your dataset.
- Set partition expiration (e.g., delete data older than 90 days).
- This helps control costs if you don’t need unlimited historical data.
Published